Wall Mounting a Plasma or LCD Flat Panel
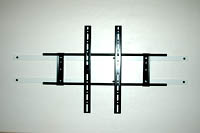
Some Wall Mount Brackets:
40" to 70" |
up to 60" |
32" to 50" |
37" to 60" |
30" to 50" |
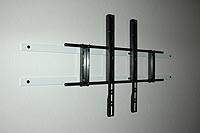
40" to 70" |
up to 60" |
32" to 50" |
37" to 60" |
30" to 50" |
This
is not a universal guide to wall mounting your TV, but this may be helpful,
especially
if the placement of your wall studs
does not lend itself to proper mounting.
In this example, we
are installing the following bracket and flat screen television:
 Digicom Flush Wall Mount Model # DC-A660 (for TV's 37" to 80") Digicom Flush Wall Mount Model # DC-A660 (for TV's 37" to 80")
 Sharp Aquos LC52D64U 52-Inch 1080p LCD HDTV
|
|
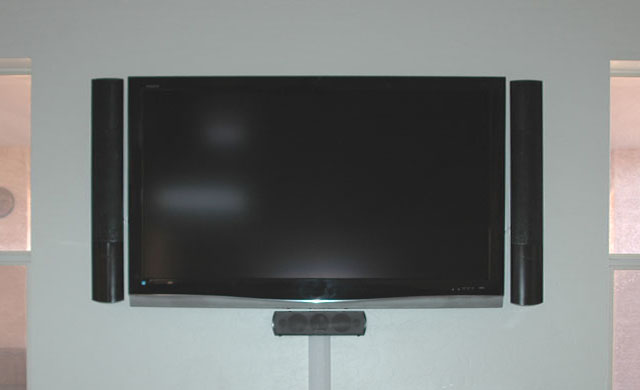
The final
wall-mounted installation is pictured above.
The cables are run through a Wiremold
chair rail mounted vertically (sold at Home Depot).
Also shown are the wall-mounted front speakers of our 5.1 surround system.
The center channel speaker is mounted 1/2" away from the wall so the
cables can pass behind it.
|
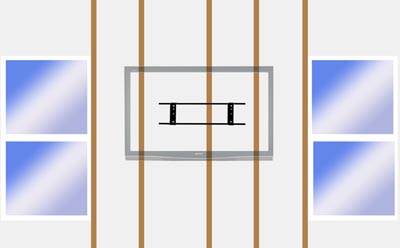
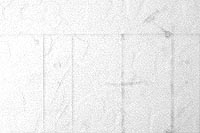
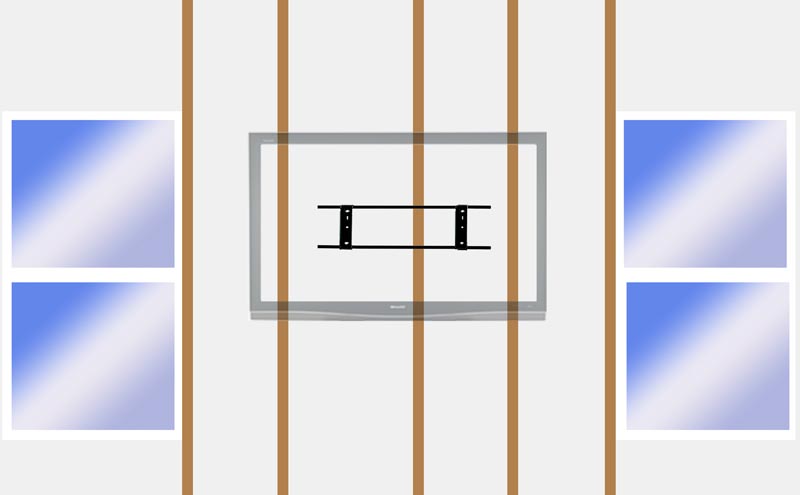
The studs in our house are not all evenly spaced,
as shown in the diagram (due to the framing of the higher set of windows
that are not shown). This is not the cause of
our problem. Even if
the studs were spaced at even 16" intervals, the relative placement
makes it impossible to mount this bracket to the studs without modifying
the bracket or the studs. Ideally, you want the center of the
TV to line up with the empty space between two studs. |
What
happens when your TV wall mount bracket doesn't line up with
your wall studs?
The picture on the left shows our desired TV location (centered between
two windows). The "wall side" of the mounting bracket is shown to scale.
There is literally no way to mount this bracket directly to the studs.
Either the TV would be off-center, or the bracket would be off-center,
causing the 90-pound TV to not be supported properly.
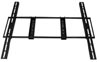
For this bracket, the two vertical supports (which are bolted
to the wall studs) slide along the horizontal bars, allowing for some
flexibility in placement, but not enough in this case.
|
| There
are two ways to solve this problem. The first is to
cut out a large section of drywall and install horizontal cross
braces (2x4s) between the studs, so you have something to bolt
the bracket to. This requires two braces
on each side of the center stud, for a total of 4 braces. If
you are running cables through the wall to hide them, chances
are you already have a lot of drywall work ahead of you, anyway,
so this may be a more desirable solution.
If you prefer not to tear up the wall, then the solution on this page is
a better choice, and it's easier and less time consuming than reinforcing
the studs inside the wall. This method basically
extends the bracket so it can be bolted to 3 adjacent wall studs. For
our installation, we decided to use a "wiremold"
cable raceway, running vertically, to hide our cables. Our walls
are heavily textured, making drywall repair more difficult. Also,
running the cables through the wall requires that you install an AC outlet
directly behind the TV because the supplied AC cord should not be run inside
of the wall. In our case, this would have required a great deal of additional
drywall repair because we do not have any existing outlets below the TV
mounting location.
Click on the images below to enlarge them. |
 |
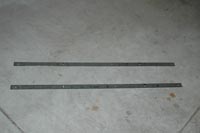
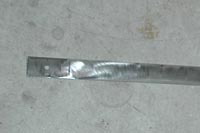
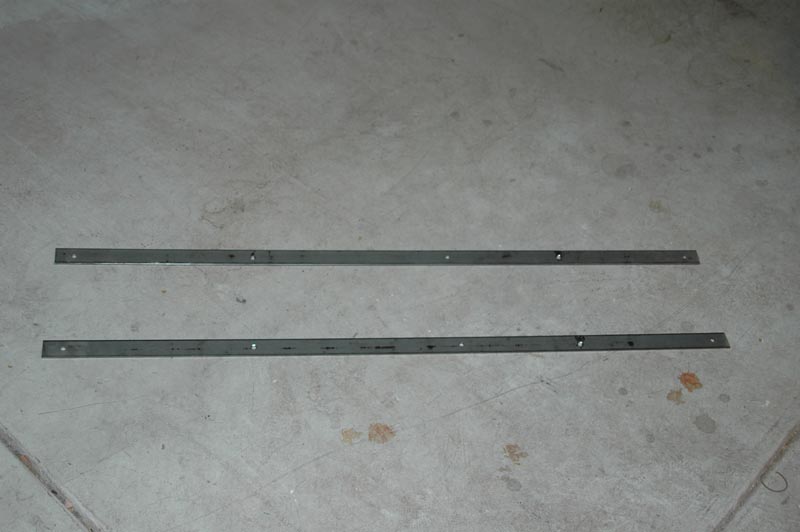
To solve our problem, we use two flat pieces of steel
long enough to span across three wall studs. The original bracket
will then mount to these bars, which are well-supported by all three
studs.
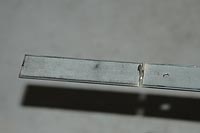
We used mild steel flat bars from Home Depot, measuring 48" long
x 1 1/4" wide by 1/8" thick. We only needed about 42" length ,
so we cut off the extra length (partially-cut bar is shown).
|
 |
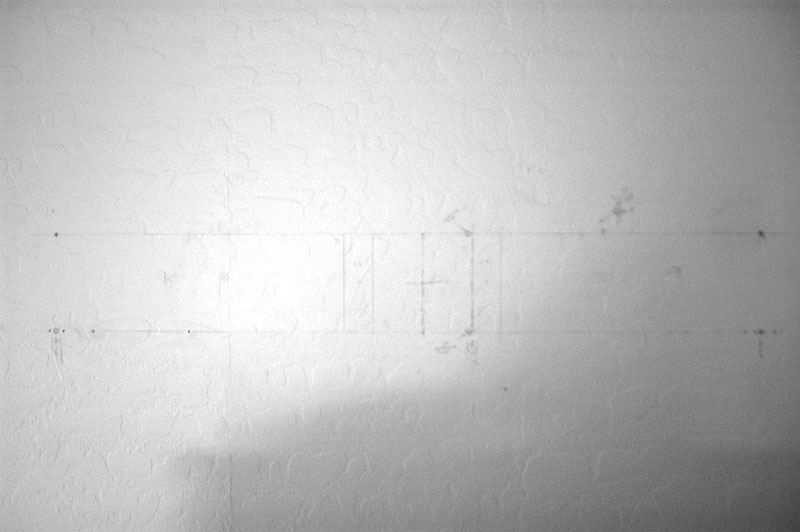
To get started, you need to know three things:
1. Your intended TV location.
2. How your bracket mounts to your TV (this can impact the location
and spacing of the wall-facing part of the bracket).
3. The locations of your wall studs.
We used a pencil to draw all of this information right on the wall, using
a large metal ruler and a level. Note the centers of the studs, and mark
the locations for the six anchor bolts. For the Digicom bracket, the
upper row of holes is exactly 5 1/2" inches
above the lower row.
|
 |
Your wall mount kit should be supplied with heavy
duty wall anchors, made to screw directly into the wood studs.
The Digicom bracket comes with 6 anchor screws, which is all we need.
(Normally, you would use 3 anchor screws to attach the vertical bracket
pieces to 2 wall studs. In our case, we are using the anchors to
attach each horizontal bar to three wall studs.)
Mark
the stud anchor locations on your flat bar and drill the holes.
The holes should be just large enough for the threads of the anchor
screws to pass through. |
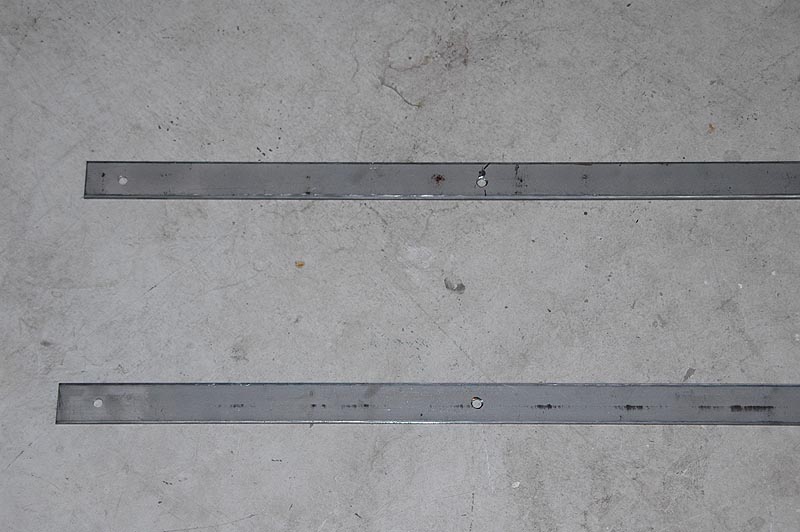
 |
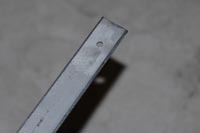
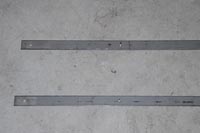
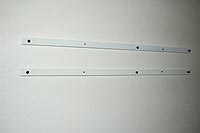
Both flat bars are shown here. Note that there are
5 holes in each bar. The 2nd and 4th holes are used to bolt the Digicom
bracket to the bars (these are the countersunk holes mentioned below). |
 |
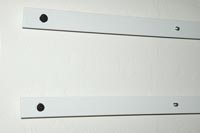
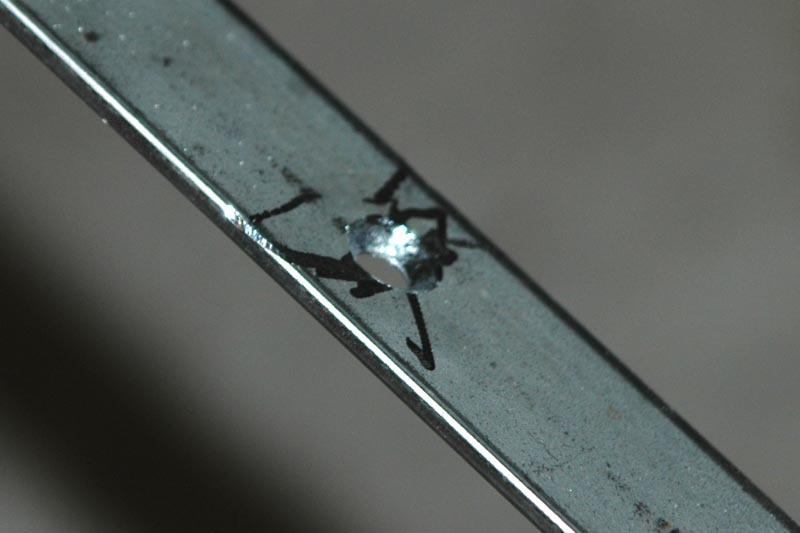
Here is a closer view. |
 |
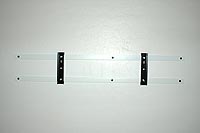
To mount the Digicom bracket to our bars, we use two
sets of countersunk 1/4" bolts, with a length of 1/2" to 3/4". The
heads of these bolts will be against the wall, with the threads protruding
through the flat bars, facing out away from the wall. (You will also
need lock washers and nuts for these bolts.)
The horizontal spacing of these bolts may depend on how the TV side of
your bracket attaches to the TV. In our case, the bolt holes on the back
of the TV are close together (7 1/8" apart), so we spaced the wall-side
supports at a wider distance of 20" apart. |
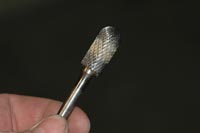 |
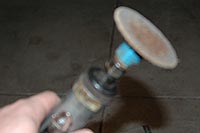
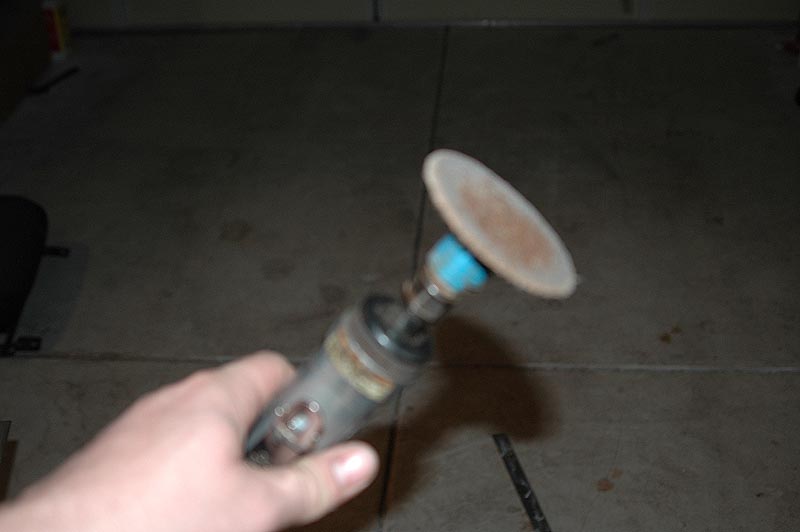
I did not have the proper bit for cutting the bevel
(countersink) into the flat bar for the bolt heads. I improvised
by using a 1/2" dome carbide burr on a die grinder. |
 |
|
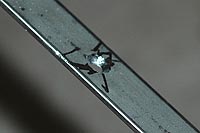
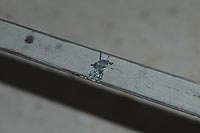
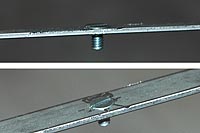
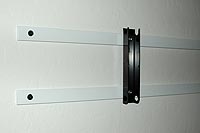
Some views of our 1/4" bolt resting in the countersunk
holes. If you are so inclinded, you can weld the bolt heads to the flat
bar to hold them in place and prevent them from rotating. I did not bother
doing this. |
 |
|
You will probably want to paint these flat bars, starting with an etching,
rust-blocking primer.
The bars are usually coated with oil and dirt when you buy them, so clean
them with a degreaser.
An abrasive disk can help remove any surface oxidation and give
the primer a better surface to adhere to. If you do this step, clean
the bars once last time with a degreaser before using primer.
|
 |
Back to the wall...
Now that our holes are all drilled, use the bars as an exact template
for drilling your stud anchor pilot holes, so that the anchors are sure
to line up with the holes in your bars. |
 |
I used an etching (rust-proof) primer and white satin
rust-resistant paint to match the wall.
Once the bars are painted, you can
mount them to the wall. You can use masking tape on the back side
of the bars to hold the 4 bracket bolts in place. |
 |
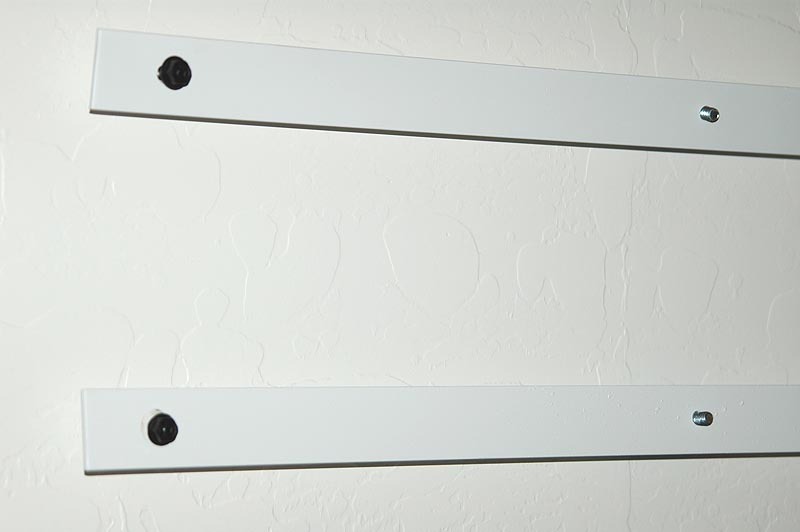
Here is a closer view, showing the threads of our 1/4"
bolts facing outward, and the black anchor screws embedded into the
wall studs. |
 |
|
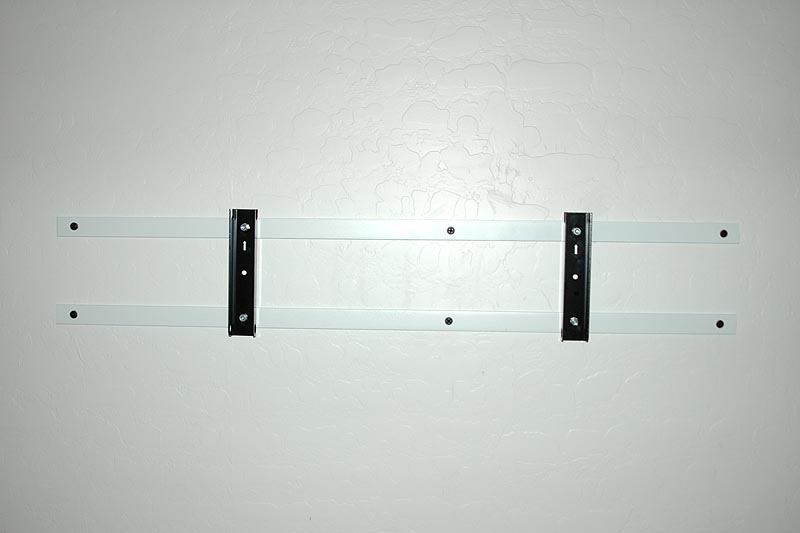
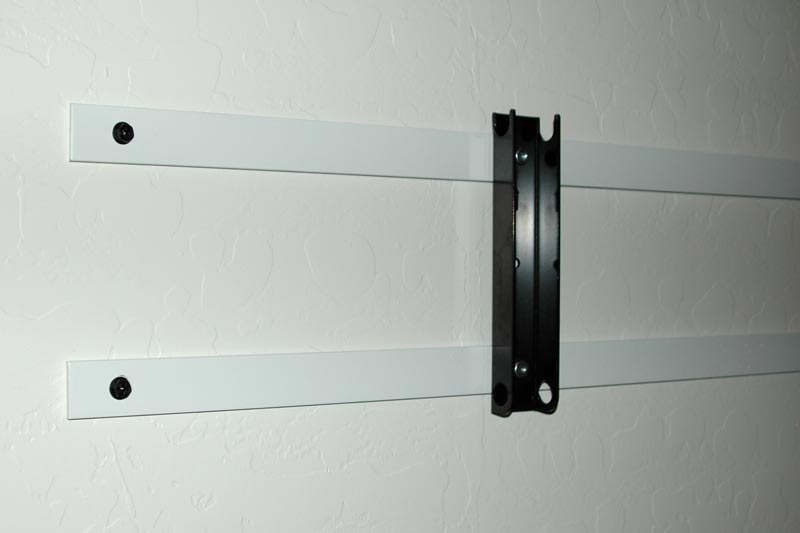
Secure the vertical sections of the bracket to the bars using lockwashers
and nuts. |
 |
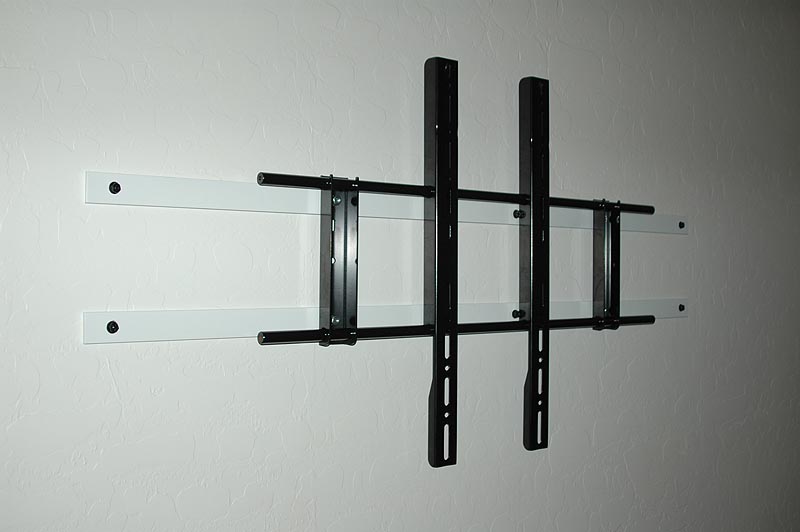
Here we show the lower horizontal round bar inserted
through the vertical "wall side" brackets, and the upper
horizontal bar inserted through the vertical "TV
side" brackets.
The "TV side" brackets bolt to the back of the TV. To hang the TV,
simply lift the TV over and let it slide down so the TV brackets
hook on to the lower horizontal bar.
|
 |
Once the TV is mounted, two 6" flat pieces (not shown)
lock the ends of the upper and lower horizontal round
bars together. These are attached with 4 bolts, threaded into the ends
of the bars. This makes it impossible to lift up on the TV or cause
it to accidentally "un-hook" from the lower bar. |
©2013 Raktron, Inc.
|

|


