Project Speed
a Computer Case Mod by Mark Purney
 |
 |
 |
 |
|
The
Process: |
|||
|
|
|
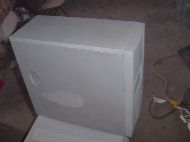 |
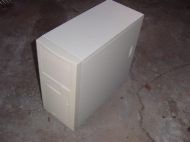
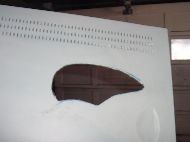
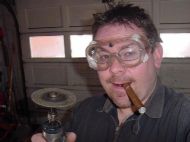
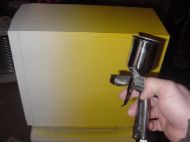
| We started off with a very boring, off-white PC case. | In this step, we actually made the plexiglass window cut-out to be integrated into the flame design. | Eye protection is important when smoking a cigar. | This photo shows the gray primer applied. |
|
|
|
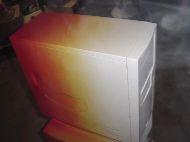 |
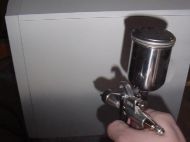
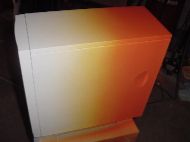
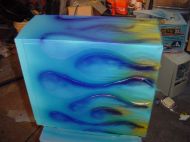
| Next, a healthy dose of Createx Base Coat White is applied. | Yellow is added as the next color of our gradient background. | Orange is next. Notice we are using typical flame colors for the background behind the flames for a different effect. | A touch of red past the orange. |
|
|

|
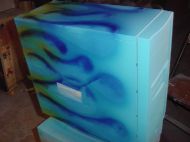 |
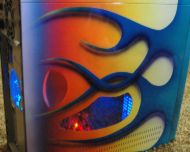
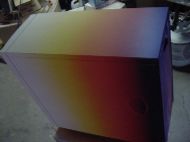
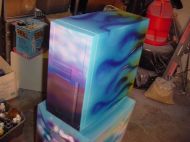
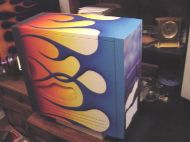
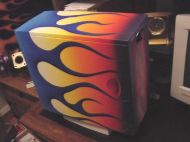
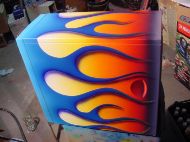
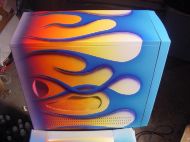
| A bit of chameleon blue & violet makes for a nice effect at the very edge. | A flame pattern is marked out using 1/8" vinyl tape. Notice the two flame licks which overlap, forming next to the contour of the window. Overlaps are a bit more challenging to pull off. | A layer of mask is put down over the 1/8" tape, and then cut with an Xacto knife, protecting our background and revealing the area to be flamed. Meow. | A light blue makes the "sky" for the image on the front of the case, but continues into the flame pattern as our flame base color. The darker blue airbrush gives the flames a 3D depth. |
|
|
|
|
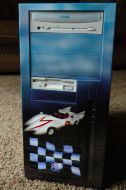
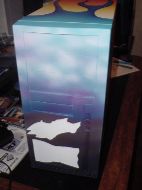
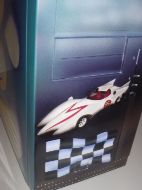
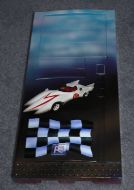
| A flash of green and gold toward the flame tip makes a nice contrast with the red and violet background at that loction. Adding more colors takes time, but the effect is worth it. | Clouds for the sky, a pink horizon, and the ground below are airbrushed on to the front of the case. | Here it is with the masking pulled off. What are those blobs on the front? The outline masks for the Mach 5 and the checkered flag were applied before we sprayed our first light blue layer, leaving the areas white! | A view from the back, showing the masking which covers the non-painted area. |
|
|
|
|
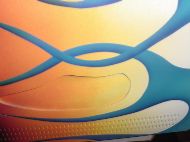
| A closer look at our flame overlap. The darker blue shading requires some freehand masking (a piece of card stock cut to shape) to make one of them appear to go behind the other. | This part takes more skill. The shadows are applied under the flames to make it appear that the flames are sitting above the background, casting a shadow. These are freehand airbrush strokes - no masking, no net to save you if you screw up. | On this side, notice how the shadow really makes the overlap stand out. It now looks like the top lick is floating above the lower one. Temporary or freehand masks are used to spray the shadow on the lick that goes "behind" the top one. | A better view of the unmasked outlines for our car and flag images. |
 |
|
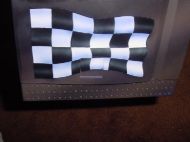
|
|
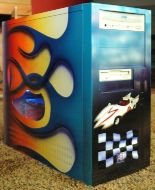
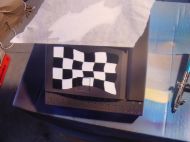
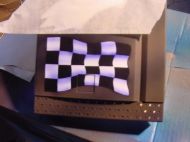
| The 3D checkered flag technique has been done many times before, but this was my first try. The mask is cut into a grid, then every other square removed for the black coat. | Some translucent violet takes our 2D checkerboard and makes it look as though it's billowing in the wind. | A closer view. Some of the masked edges came out a bit rough, so these were cleaned up later with a narrow brush. | Painting the Mach 5 took a lot of concentration so I apologize for not grabbing the camera during this process to show the individual steps. The details were cut into the mask, and lots of freehand masking was employed to provide the shading effects. |
|
|
||
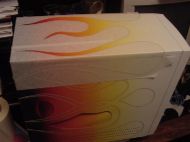
| Here is the front piece with urethane clear coat applied. | A view of the clear coated flame job. Due to the extra paint layers on the flames, it took a lot of wetsanding and multiple coats of automotive polyurethane to get it perfectly smooth. It was then buffed with polishing compound and glaze for that "show car" finish. | ||